> ## Documentation Index
> Fetch the complete documentation index at: https://dev.jup.ag/docs/llms.txt
> Use this file to discover all available pages before exploring further.
# How to Embed a Swap Widget in Your App
> Add a full-featured token swap to your app with one script tag. No RPC, no wallet infrastructure, no UI to build.
## TL;DR
Jupiter Plugin gives you the same swap experience as [jup.ag](https://jup.ag), embedded directly in your app. One script tag, one function call. No RPC node, no wallet adapter code, no UI to build. Powered by [Ultra](/ultra/index), which handles routing, slippage, MEV protection, and transaction sending.
**Video walkthrough + source code:** Watch the [video walkthrough](https://x.com/JupDevRel/status/2033528378134028756) and grab the [demo app source code](https://github.com/jup-ag/api-examples/tree/main/apps/plugin-community-site) on GitHub.
***
## Prerequisites
No API key or RPC node required. Jupiter Plugin handles all infrastructure.
For framework-based apps, you need **Node.js and npm** installed from [nodejs.org](https://nodejs.org). For plain HTML, you just need a browser.
***
## Quick start
The simplest way to add a swap widget: a single HTML file:
```html theme={null}
My App
```
Save this as `swap.html`, serve it locally, and open it in your browser:
```bash theme={null}
npx http-server -o /swap.html
```
## Try it yourself
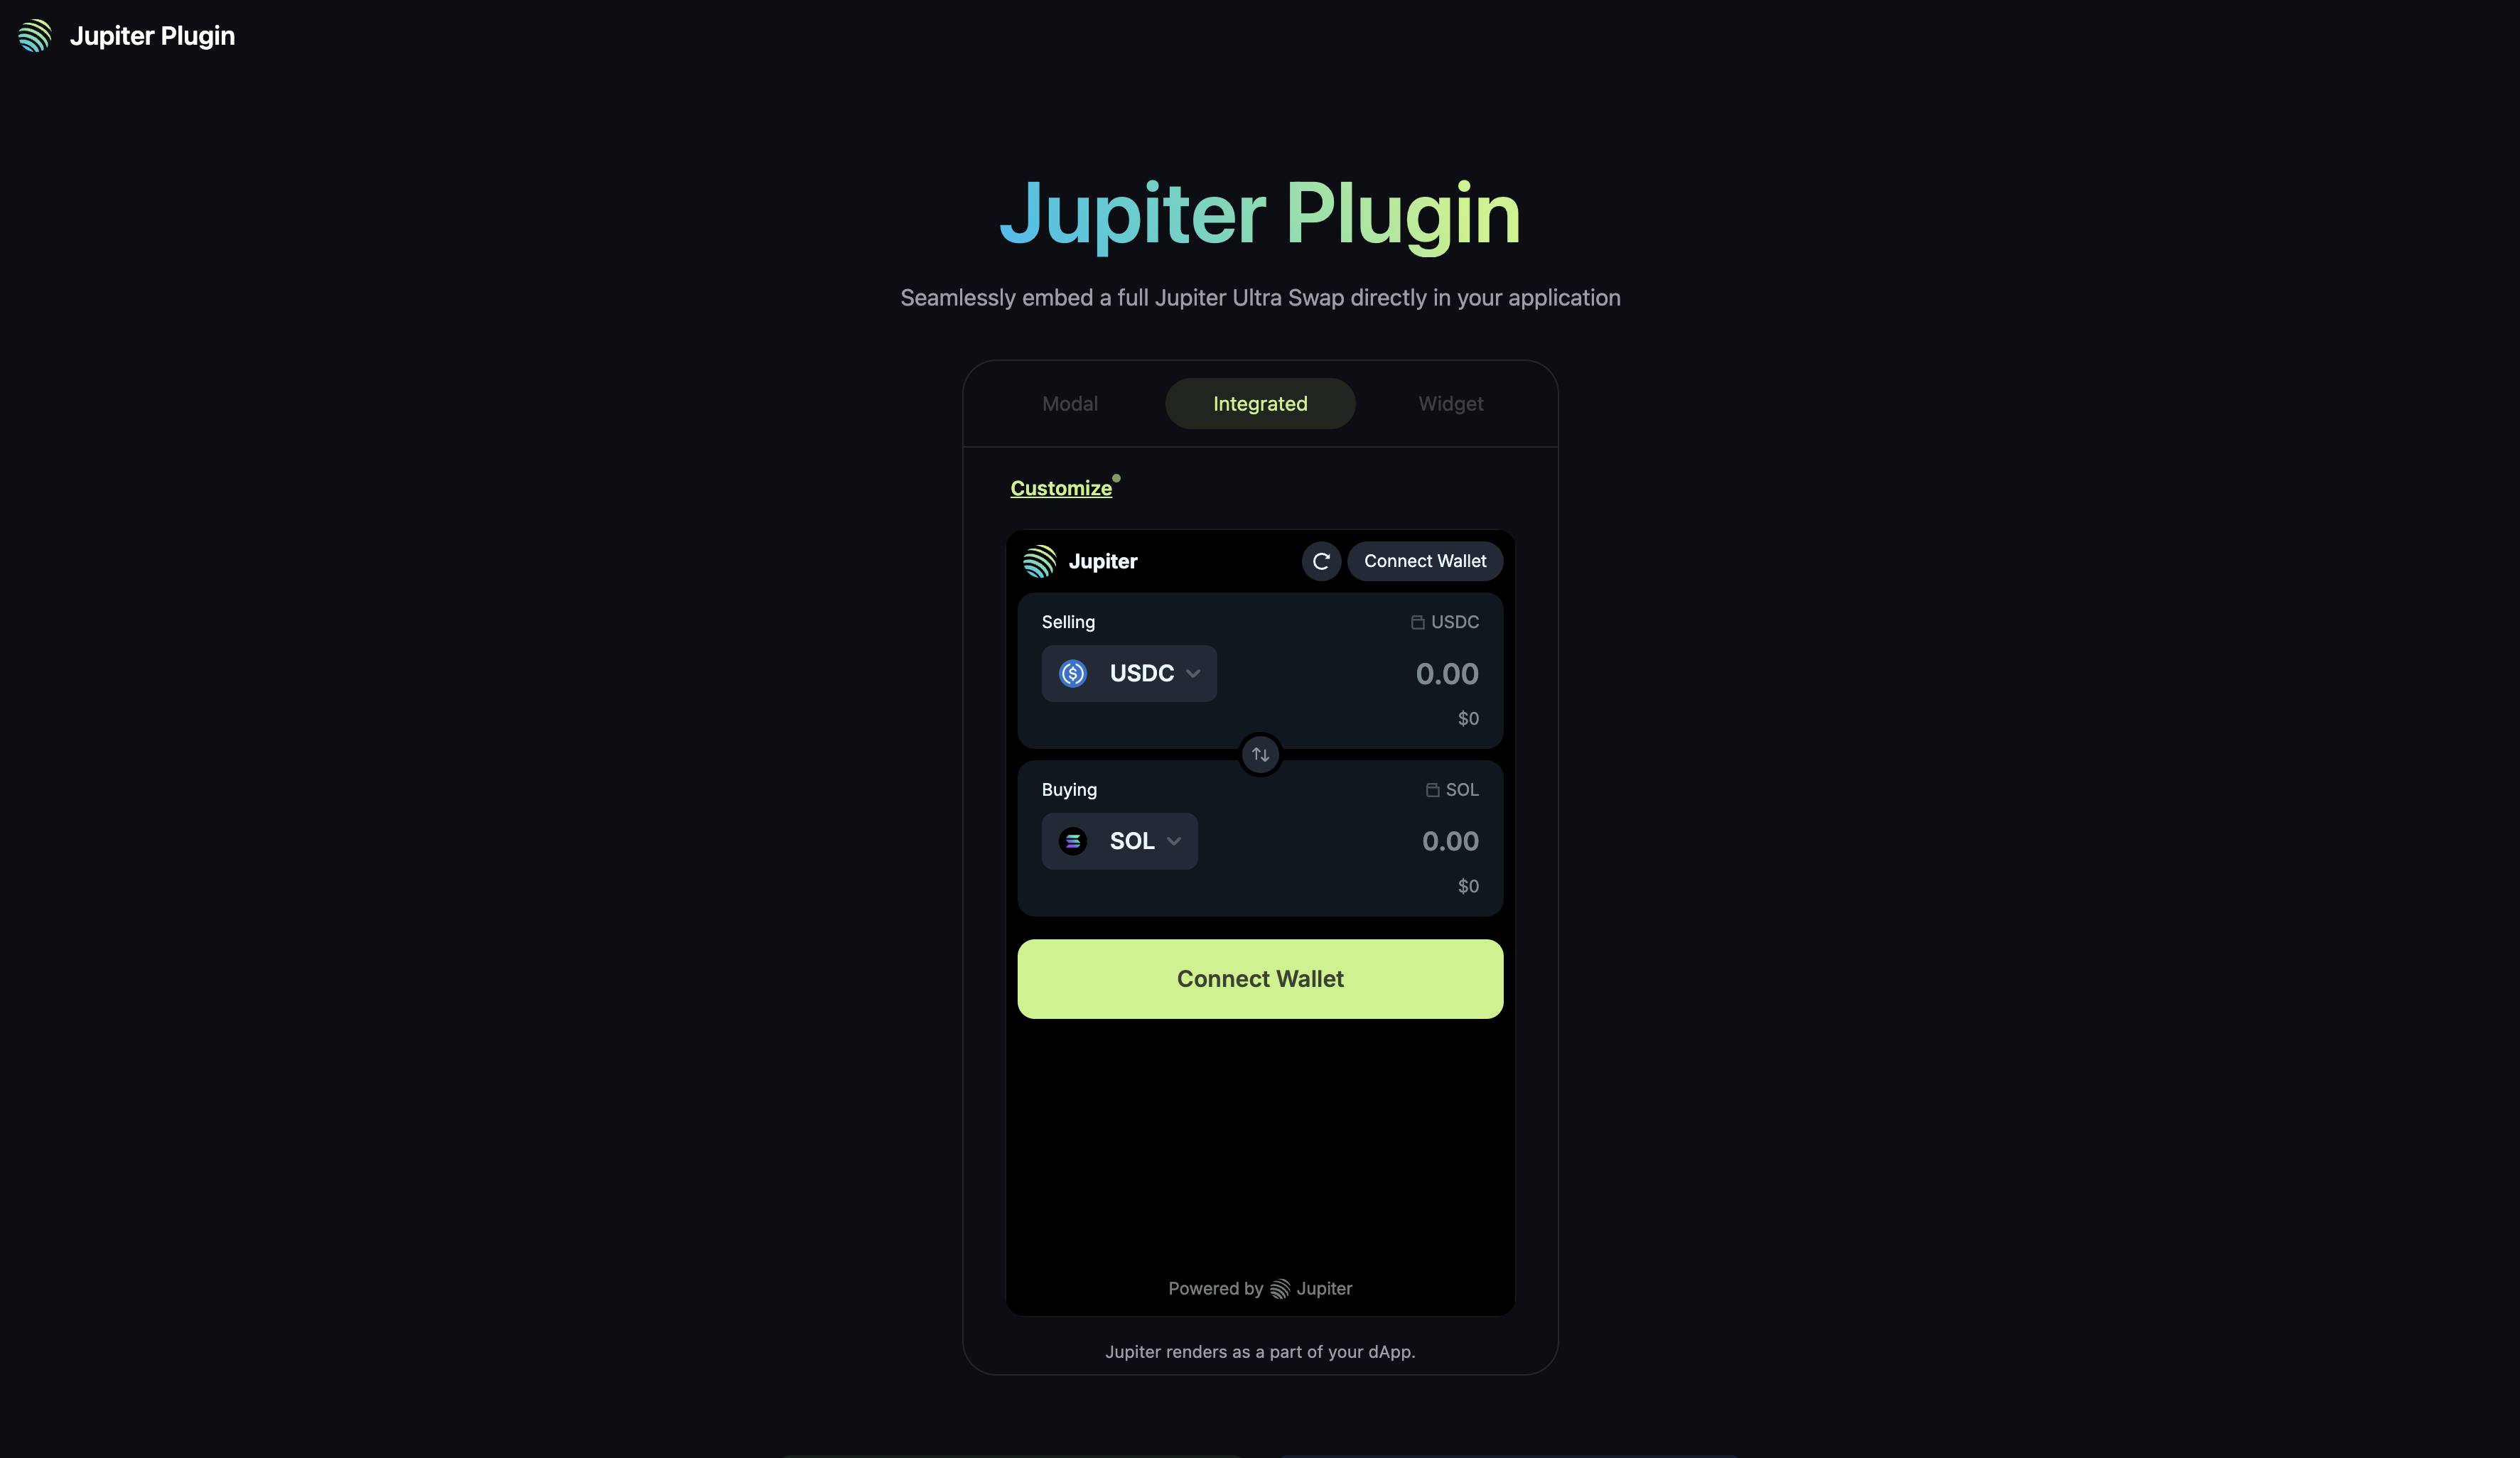
Not ready to write code? The [Plugin Playground](https://plugin.jup.ag/) lets you experience the full swap widget live in your browser. Switch display modes, set token defaults, tweak colours, and copy the generated code when you're ready to integrate.
 {
e.target.style.opacity = '1';
e.target.style.border = '2px solid #C8F284';
}}
onMouseLeave={(e) => {
e.target.style.opacity = '1';
e.target.style.border = '2px solid transparent';
}}
data-og-width="3546"
width="3546"
data-og-height="2052"
height="2052"
data-path="static/images/plugin-playground.png"
data-optimize="true"
data-opv="3"
srcset="https://mintcdn.com/jupiter/mrenEfoqnubhOTHf/static/images/plugin-playground.png?w=280&fit=max&auto=format&n=mrenEfoqnubhOTHf&q=85&s=8395349bbf7f758ca18591330ca87fc7 280w, https://mintcdn.com/jupiter/mrenEfoqnubhOTHf/static/images/plugin-playground.png?w=560&fit=max&auto=format&n=mrenEfoqnubhOTHf&q=85&s=46e08b413d1673216c5a1c4d57126c91 560w, https://mintcdn.com/jupiter/mrenEfoqnubhOTHf/static/images/plugin-playground.png?w=840&fit=max&auto=format&n=mrenEfoqnubhOTHf&q=85&s=2914dd9f251c0f3df220e1a31e04f63c 840w, https://mintcdn.com/jupiter/mrenEfoqnubhOTHf/static/images/plugin-playground.png?w=1100&fit=max&auto=format&n=mrenEfoqnubhOTHf&q=85&s=9d4185743a5a3991ac7e595443788fc8 1100w, https://mintcdn.com/jupiter/mrenEfoqnubhOTHf/static/images/plugin-playground.png?w=1650&fit=max&auto=format&n=mrenEfoqnubhOTHf&q=85&s=a7ebc84c3d7e2d259f20c50d8fb2cb13 1650w, https://mintcdn.com/jupiter/mrenEfoqnubhOTHf/static/images/plugin-playground.png?w=2500&fit=max&auto=format&n=mrenEfoqnubhOTHf&q=85&s=ce6b355f81e4a7e0d9e69945e8c0a5a7 2500w"
/>
***
## When you need this
You want to add swap functionality to your app or website without building any of it yourself:
* **App with swap:** Your app needs token swaps but you don't want to build the UI, handle transactions, or run an RPC node.
* **Community token site:** Let your community buy your token directly on your website by locking the output mint with `fixedMint`.
* **Quick swap access:** Add a floating widget to any page for convenient swapping.
Common searches that lead here:
* "embed swap widget solana"
* "add token swap to my website"
* "jupiter plugin integration"
* "buy token widget solana"
* "solana swap widget no backend"
* "drop-in swap component solana"
* "add jupiter swap to react app"
* "token swap widget html"
***
## Why Jupiter Plugin
Building a swap interface from scratch means:
* Running an RPC node
* Integrating a wallet adapter
* Building the swap UI
* Handling quoting, routing, slippage, and MEV protection
* Managing transaction errors and retries
Jupiter Plugin handles all of this. You get the full [jup.ag](https://jup.ag) swap experience as a drop-in component:
* **No RPC:** Powered by Ultra, which handles all transaction sending.
* **No wallet code:** Plugin provides wallet connection out of the box (users connect their existing browser wallet like Phantom or Backpack).
* **No UI to build:** Complete swap interface with token search, price display, and transaction status.
* **No error handling:** Plugin manages slippage, retries, and transaction failures.
***
## Code examples
Add the plugin script to your page, then call `window.Jupiter.init()`. Here's a complete working example for each framework:
```html HTML theme={null}
Jupiter Plugin Demo
{
e.target.style.opacity = '1';
e.target.style.border = '2px solid #C8F284';
}}
onMouseLeave={(e) => {
e.target.style.opacity = '1';
e.target.style.border = '2px solid transparent';
}}
data-og-width="3546"
width="3546"
data-og-height="2052"
height="2052"
data-path="static/images/plugin-playground.png"
data-optimize="true"
data-opv="3"
srcset="https://mintcdn.com/jupiter/mrenEfoqnubhOTHf/static/images/plugin-playground.png?w=280&fit=max&auto=format&n=mrenEfoqnubhOTHf&q=85&s=8395349bbf7f758ca18591330ca87fc7 280w, https://mintcdn.com/jupiter/mrenEfoqnubhOTHf/static/images/plugin-playground.png?w=560&fit=max&auto=format&n=mrenEfoqnubhOTHf&q=85&s=46e08b413d1673216c5a1c4d57126c91 560w, https://mintcdn.com/jupiter/mrenEfoqnubhOTHf/static/images/plugin-playground.png?w=840&fit=max&auto=format&n=mrenEfoqnubhOTHf&q=85&s=2914dd9f251c0f3df220e1a31e04f63c 840w, https://mintcdn.com/jupiter/mrenEfoqnubhOTHf/static/images/plugin-playground.png?w=1100&fit=max&auto=format&n=mrenEfoqnubhOTHf&q=85&s=9d4185743a5a3991ac7e595443788fc8 1100w, https://mintcdn.com/jupiter/mrenEfoqnubhOTHf/static/images/plugin-playground.png?w=1650&fit=max&auto=format&n=mrenEfoqnubhOTHf&q=85&s=a7ebc84c3d7e2d259f20c50d8fb2cb13 1650w, https://mintcdn.com/jupiter/mrenEfoqnubhOTHf/static/images/plugin-playground.png?w=2500&fit=max&auto=format&n=mrenEfoqnubhOTHf&q=85&s=ce6b355f81e4a7e0d9e69945e8c0a5a7 2500w"
/>
***
## When you need this
You want to add swap functionality to your app or website without building any of it yourself:
* **App with swap:** Your app needs token swaps but you don't want to build the UI, handle transactions, or run an RPC node.
* **Community token site:** Let your community buy your token directly on your website by locking the output mint with `fixedMint`.
* **Quick swap access:** Add a floating widget to any page for convenient swapping.
Common searches that lead here:
* "embed swap widget solana"
* "add token swap to my website"
* "jupiter plugin integration"
* "buy token widget solana"
* "solana swap widget no backend"
* "drop-in swap component solana"
* "add jupiter swap to react app"
* "token swap widget html"
***
## Why Jupiter Plugin
Building a swap interface from scratch means:
* Running an RPC node
* Integrating a wallet adapter
* Building the swap UI
* Handling quoting, routing, slippage, and MEV protection
* Managing transaction errors and retries
Jupiter Plugin handles all of this. You get the full [jup.ag](https://jup.ag) swap experience as a drop-in component:
* **No RPC:** Powered by Ultra, which handles all transaction sending.
* **No wallet code:** Plugin provides wallet connection out of the box (users connect their existing browser wallet like Phantom or Backpack).
* **No UI to build:** Complete swap interface with token search, price display, and transaction status.
* **No error handling:** Plugin manages slippage, retries, and transaction failures.
***
## Code examples
Add the plugin script to your page, then call `window.Jupiter.init()`. Here's a complete working example for each framework:
```html HTML theme={null}
Jupiter Plugin Demo
Jupiter Plugin Demo
```
```tsx React theme={null}
import { useEffect } from "react";
// Add to public/index.html :
//
export default function App() {
useEffect(() => {
window.Jupiter.init({
displayMode: "integrated",
integratedTargetId: "jupiter-plugin",
});
}, []);
return (
);
}
```
```tsx Next.js theme={null}
"use client";
import { useEffect } from "react";
import Script from "next/script";
export default function SwapPage() {
return (
<>